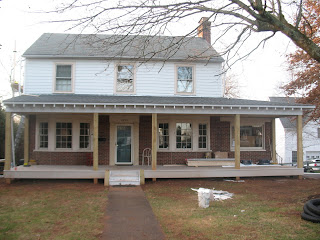
December 31, 2009

Week 13-14 (Dec 21 through Dec 28)

When we started designing the renovations back in June we decided we would spruce up the kitchen by painting the cabinets. We liked what we saw in our two walkthroughs (as well as the photos we looked at again and again during escrow) and therefore set aside only a minimal amount of money for kitchen improvements. Our final renovation decisions included a new Family Room, Front Porch, Air Conditioning, Siding, and improvements to a detached "cottage". Below is the floor plan showing the porch and sunroom additions as well as a key plan of the kitchen showing original photos.


Photo 1: Back of the kitchen

 
Photo 2: Side of the kitchen

 
Photo 3: Kitchen wall adjoining dining room


Photo 4: Dining room wall adjoining kitchen


After a few months of living at the house we found that we rarely used our dining room. We set a small table in the kitchen and ate almost all of a our meals in there. With two small children almost half of our dinner time is spent getting up and down for things we forgot and cleaning up spills! The exception to the kitchen "nook" dining has been two birthday parties we hosted because we needed more space.This became comical when we ate Thanksgiving dinner in the dining room and our three-year old son requested that we sing happy birthday because all former meals there were birthdays. We'd thus come to realize that our kitchen and dining rooms were too detached--both from one another and from the rest of the house--and that some modification was needed.

Unfortunately this realization came after we had burned through most of our contingency and reserve funds, so modifications had to be relatively inexpensive. We couldn't do new cabinets but the countertops cried out to be replaced; the laminate had de-laminated in several spots and was cracked and severely stained in others. Our "ultimate" kitchen design would have included taking over the small bathroom adjacent to the kitchen and making it a breakfast nook. In addition the wall between the kitchen and dining rooms would be removed.


We explored this option for several weeks. Around the same time however, a construction mishap (for lack of a better term) at the sunroom sapped most of our remaining reserve fund. Thus, our kitchen re-do would have to be shoestring. We opted to remove only the non-bearing wall between the kitchen and dining rooms and add an island coutnertop between them. The fridge and adjacent cabinets would be moved to the interior wall and we would paint the cabinets (as originally planned) to freshen them up.

The photos below show only a few days of work in this area, basically the removal of the wall. The impact already is amazing! We anticipate a couple more weeks to get things functional again, though it will likely be a month or more until we have things buttoned back up. Until then, we're eating breakfast in our hallway and dinner at my inlaws.


Photo in the same direction as "4" above.

 
Photo in the same direction as "3" above.

December 30, 2009

Weeks 10-12 (11/30 through 12/14)

These few weeks saw the substantial completion of the contractor's work, including--with much excitement on my part--the siding. Since Week 2 way back in October we have had Tyvek or plastic on substantial portions of our 2nd floor. I've been somewhat skeptical regarding the purported water-proofness of the Tyvek system (and less so of the plastic sheeting), especially after the entry room ceiling showed signs of leaking (after the new roof was added. The entry room is the one story portion on the right of the house; see below).


Siding completed on the front | Tyvek still on the side

Apparently water was getting in behind the roof flashing because the flashing was installed over the Tyvek. The new siding, installed on top of the flashing, has corrected the issue. Anyway, waterproofness caused only part of my anxiety over the last several months. Our house sits on top of a ridge. Being as such, we have pretty decent winds on a regular basis. And when wind gets behind Tyvek, especially if its not nailed super well, it produces an incredibly loud whipping sound. It's loud enough to have caused many sleep-deprived nights for Emili and I as well as our children (which in turn, makes for more sleepless nights for us!)


Siding mostly complete on the back | We still need to paint the addition siding!


Needless to say, we are incredibly happy to have the siding complete. Everyone is sleeping better. There appears to be no more leaking. And the visual impact of the new siding is striking (the old siding was a cracking and mold-stained wavy asbestos).


"Finished" front elevation with a (relatively) clean front yard


At this point the contractor has only very minor things to complete, including, as I'll detail in a later post, a fairly substantial construction mishap. Other than that, we're still awaiting the concrete floor in the entry room as well as a carpet / vinyl in the rental. We also have lots of painting to do and the weather in Charlottesville has been less than cooperative lately. Finally, last week we also decided to demo one interior wall in the house--the one between our kitchen and dining rooms. The initial impact has been amazing (more in a later post). Its currently causing a bit of a challenge in terms of eating at our house, but in the long run will be totally worth it.

December 21, 2009

Week 9 (11/23/09)


Being that this was Thanksgiving the contractor had a short week and worked mostly on punchlist items (cleanup type stuff related to the original scope of work). My parents came into town for the holiday and as soon as my dad arrived I put a paintbrush in his hand!


The four days off provided spectacular albiet chilly weather and my dad and I endured the difficult task of painting every nook and cranny between the exposed rafter tails. I love the look of open rafters but partway through painting them wondered about the sanity of their detailing. My neighbor had warned me they would be a painting nightmare and all told we spent a combined 20+ "holiday" hours on them. We did sneak in a few good runs (6 and 10 miles) and were able to catch the entire VT / UVA football game. So all in all it was a great few days.


As I'm writing this post a few weeks late, I can't believe how fortunate we actually were. Since Thanksgiving, Virginia has rarely had two consecutive days above 50 degrees; I've tried to paint the rest of the exterior as well as the porch columns, to no avail. The cold weather culminated in 24" of snow this past weekend! This change in the weather took a bit of adjusting for me...after living 7 years in Southern California I'd become accustomed to having 70 degrees and sun after a day or two of rain. I forgot that when winter comes on the East Coast, it usually doesn't leave for months. So to have a few extra able bodies around the house both to help paint as well as watch the kids (thanks mom!) was priceless. All of the "critical" painting got done and the exposed wood was sealed for the winter.

November 25, 2009

Week 8 (11/16/09)

As we're closing in on the original completion deadline (Nov 30) I'm realizing that we're not going to finish on schedule. To those who have done renovations on old houses this will come as no surprise! Even the general contractor who has stayed relatively close to his schedule will not hit the target date. The schedule has caused me a lot of headache over the past few weeks due to our loan committment deadline. However this week I was able to negotiate out of it (which is doubly good as rates have come down even more) and will re-lock our permanent loan after Thanksgiving. This means our construction loan will close early next year.

Loan locks and deadlines notwithstanding work moved steadily along this past week. The contractor shingled the entire roof, installed skylights in the sunroom, finished interior trim, and finished the porch floor. On our end we cleaned the cottage in order to finish and wax the floor--we decided to have a finished concrete floor rather than the less durable laminate floor option--and we also began painting the .


November 13, 2009

Weeks 6 and 7 (11/2/09 and 11/9/09)

Trim and finish-type work continued this week in earnest. The sunroom / family room (we still haven't decided what to call it) received batton strips and window trim on the exterior; the interior was drywalled. On the front porch the roof plywood and ice shield were added.


Since the roof was added to the front porch we've been really happy about the amount of light still reaching the current dining and living rooms. We were initially a bit worried (particularly about the living room) being dark, especially now that the days are really short. However the porch ended up being set up high enough so as not to block too much winter daylight. Next week two skylights will be cut into the roof of the sunroom directly in front of the living room windows which will add more light back into the living room.

So overall the contractor is making good progress and is, for the most part, on schedule. On the other end of the spectrum, the tasks that we have taken on--the cottage upgrades and entry / bathroom--are dragging! I'm not sure if this is because we're running the show (as compared with the contractor) or because we encountered several unforseen conditions; lots of sill rot in the cottage and the large hole in the entry room. Whatever the case may be, the cottage is finally nearing the 'trim out' stage where I can get moving on the kitchen and where we can paint the walls.


October 31, 2009

Week 5 (10/26/09)

It felt like lots of work got done this week. Monday after work I tore off part of the front siding in anticipation of the porch framing going up. Much of the back siding also came off in order to repair rotted trim around three large double windows.


While the massing of the porch was changing the feel of the front of the house, the contractor began working on many of the details at the back sunroom. Radiant tubing was placed in the floor before pouring the concrete; wood beadboard was added between the exposed rafter tails; and 4x10 sheets of Hardi-board siding were installed (eventually they will add batton strips for a board-and-batten look).


October 25, 2009

Weeks 3 and 4 (10/12/09 and 10/19/09)

After the foundations and block walls were placed last week week 3 saw the walls framed and the roof rafters and roof sheathing installed. This gave us the first sense of the enclosed space we had designed.


The joy didn't last long. On Wednesday the contractor discovered that they had set the roof height using a small bathroom window at the back of the house. As they continued to frame the roof around the side and to the front of the house, the top of the new roof (where it connected to our existing walls) would have covered over the lower windows at the front of the house.

After considering a few options during the rainy days at the end of the week (Thursday and Friday) the contractor started Week 4 by tearing off the roof framing and starting over. This week was kind of a drag all around--for the contractor because he was doing re-work and for us because I got a week-long flu bug (likely H1N1). In hindsight, removing and replacing the roof was definitely the best option we considered. By the end the week the contractor had not only re-framed with roof all the way around the side but had also installed the windows. It was starting to feel like a room!


October 14, 2009

Progress: Week 2

In the flurry of activity that is our house, I have been negligent in posting updates. Week 2 of our project was actually last week (Oct 5-9), and I'm just now getting around to posting photos from then. I hope to do this week's update later today or tomorrow, mostly because the rain predicted for the next few days will likely bring the work to a halt until next week.


Week 2 was part demolition / part construction. We got rid of about 1/3 of our asbestos siding, tore up what will be the entry / play room (and found our first "surprise" there), and finished gutting the cottage. On the construction side of things the contractor started the floor and wall framing for the sunroom / family room and the cottage received new plumbing and a new closet / bathroom configuration.


Trench for family room footings


Oliver loves having "bulldozers" in his yard

 
Waste concrete from the back patio

 
Concrete for the family room footings

 
Concrete for the front porch pier footings


Side and part of back without asbestos siding

 
 Tyvek-ing the side


Side "storage room" before demo. We're not sure what
this room was used for but it definitely felt like a hunting lodge.


Side room part way through demo.
Surprise, its not slab-on-grade!

When the plumbers were trenching through the concrete to lay the plumbing and waste line (above), they discovered that the slab at the side entry room was actually suspended over a small but inacessable crawl space--not poured on grade as we originally thought (well, 1/3 of it was on grade; its the part furthest from where the photo was taken). This turned out to be good fortune as we can now provide heat and air conditioning through the underfloor space where we had previously struggled to figure out a way to condition it. After the plumbing and ductwork are installed we'll backfill the crawl space with gravel and finish the floor with radiant heated concrete.

September 29, 2009

Let the Demo Begin!


Normally, a backhoe parked in your front yard would be cause for concern. Today however there was (metaphorical) cheering in our house. After three+ weeks of waiting we finally got our building permit! This means that the contractor can finally begin on the foundations--something he did today. Over the last couple of weekends we have spent time demolishing various portions of the house that are first up on the renovation list, including:
  • Removing boxwoods at front of house to make way for front porch
  • Demolishing the kitchen in the guest cottage
  • Demolishing the tile flooring in the entry area
  • Removing the (leaking) abandoned underground fuel tank and contaminated soil
  • Demolishing the back steps for the new sunroom


preparing to remove the  underground tank
(note the large boxwoods covering the windows)


hole left by the tank and contaminated soil


750 gallons of liquid warmth

 
demolished back steps

 
 front of the house minus boxwoods

 
what's left of the kitchen in the cottage

The rest of the contractor's schedule this week includes placing concrete for the footings (Thursday) and laying of the block walls for the sunroom crawlspace (Friday). Framing begins next week. Emili and I are hoping to start building the kitchen cabinets and begin removing the asbestos siding from the back (West) and North sides of the house.